

Well I figure that it's about time* for me to begin a thread for my upcoming project, a new-to-me 2005 Kawasaki Z750s in blue. (*by "about time" I mean that I'm getting bored of just shopping for parts and reading about all of the inspirational work the rest of you are doing)
While it'll be about one month until I begin the actual process of D-in-W, due to my present location and working environment, I wanted to post the initial pic of the bike and the list of work to be done, parts to be ordered, parts already ordered, etc.
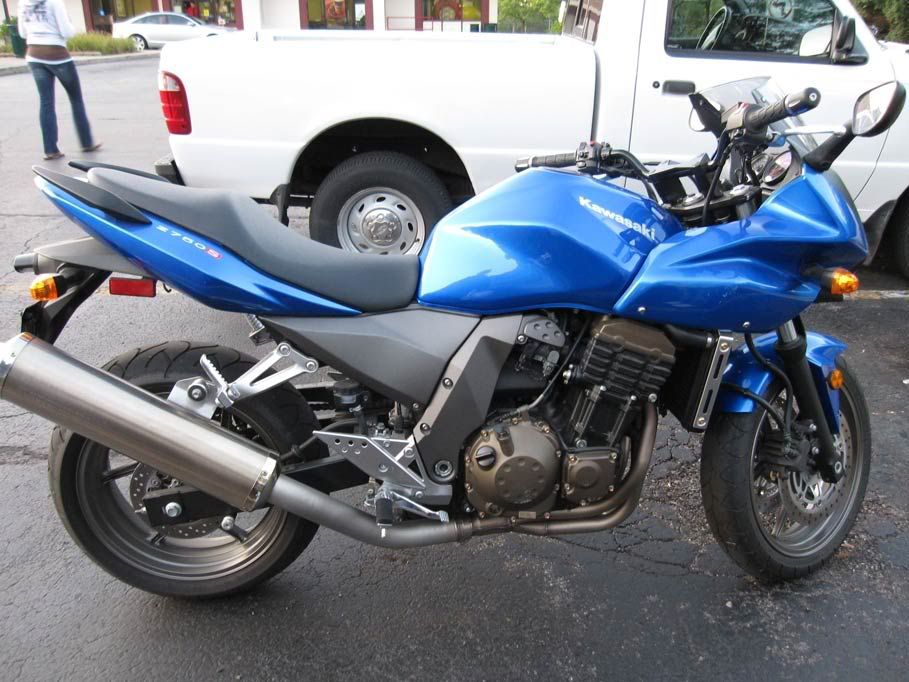
First, the bike:
![Image]()
I bought the new bike in the fall of '09, sight unseen, with 1000 miles on the clock, to replace my last '06 Z750s that was stolen towards the end of the 2008 riding season. The guy I bought it off of cut me a sweet deal once he found out I was calling from Iraq, and he went above and beyond in order to make the transfer go smoothly.
I finally got a chance to see the bike in person a couple of months back while home on leave, and it didn't disappoint. Clean (outside of having been tipped over at a standstill prior to having bought it), low miles, perfect for my upcoming plans.
The list of work to be done:
-2006 Kawa 636 Rear swingarm, wheel, and brake swap
-Race Tech fork springs and emulators
-Supersprox chain and +2 rear chainring
-Install Speedohealer
-Cut down the exahust can
-Black out the frame covers, rearsets, passenger pegs, radiator covers, and exhaust
-Remove rear fender
-Mod and wrap/insulate airbox
My hope is to knock out all of that list within the first week or so of arriving back home, with more plans (paint, headlights, 636 fork/brakes/wheel swap) for the winter. I welcome any and all input/suggestions/pointers. Thanks.
While it'll be about one month until I begin the actual process of D-in-W, due to my present location and working environment, I wanted to post the initial pic of the bike and the list of work to be done, parts to be ordered, parts already ordered, etc.
First, the bike:
I bought the new bike in the fall of '09, sight unseen, with 1000 miles on the clock, to replace my last '06 Z750s that was stolen towards the end of the 2008 riding season. The guy I bought it off of cut me a sweet deal once he found out I was calling from Iraq, and he went above and beyond in order to make the transfer go smoothly.
I finally got a chance to see the bike in person a couple of months back while home on leave, and it didn't disappoint. Clean (outside of having been tipped over at a standstill prior to having bought it), low miles, perfect for my upcoming plans.
The list of work to be done:
-2006 Kawa 636 Rear swingarm, wheel, and brake swap
-Race Tech fork springs and emulators
-Supersprox chain and +2 rear chainring
-Install Speedohealer
-Cut down the exahust can
-Black out the frame covers, rearsets, passenger pegs, radiator covers, and exhaust
-Remove rear fender
-Mod and wrap/insulate airbox
My hope is to knock out all of that list within the first week or so of arriving back home, with more plans (paint, headlights, 636 fork/brakes/wheel swap) for the winter. I welcome any and all input/suggestions/pointers. Thanks.


