Custom Fighters - Custom Streetfighter Motorcycle Forum banner

Jmartin's '82 KZ1000 Build

18K views 128 replies 17 participants last post by  jmartin1110  
#1 ·
Alright...here goes nothing
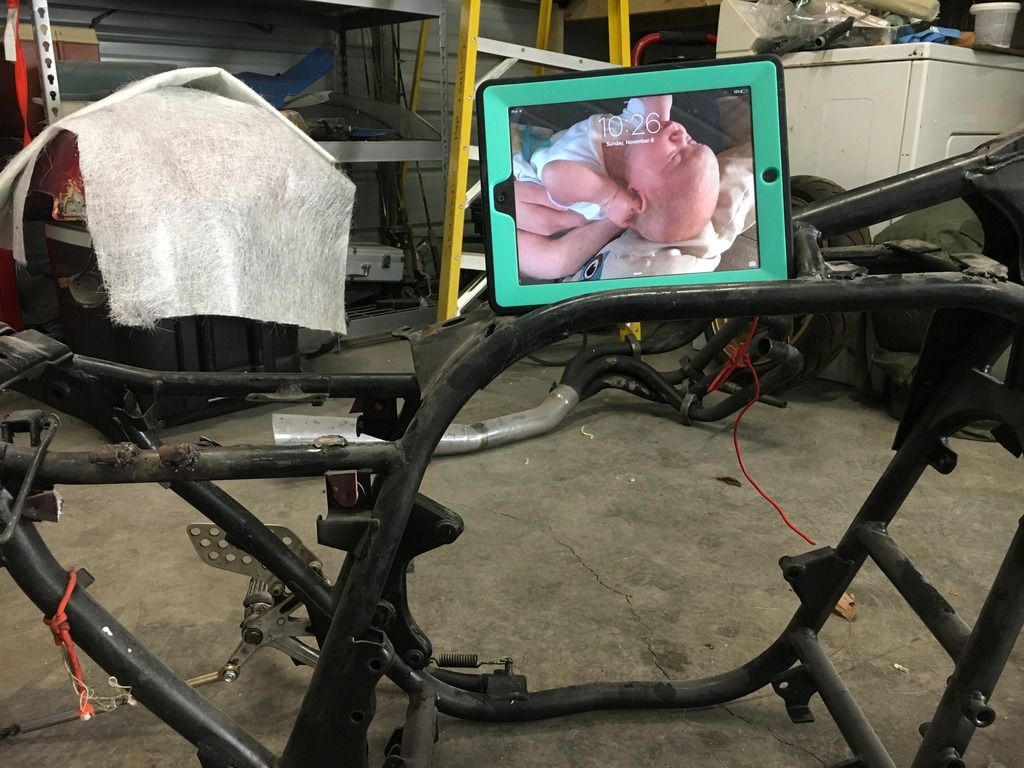
First proof of date


The plan for this is very simple. Make it a finished version of this:


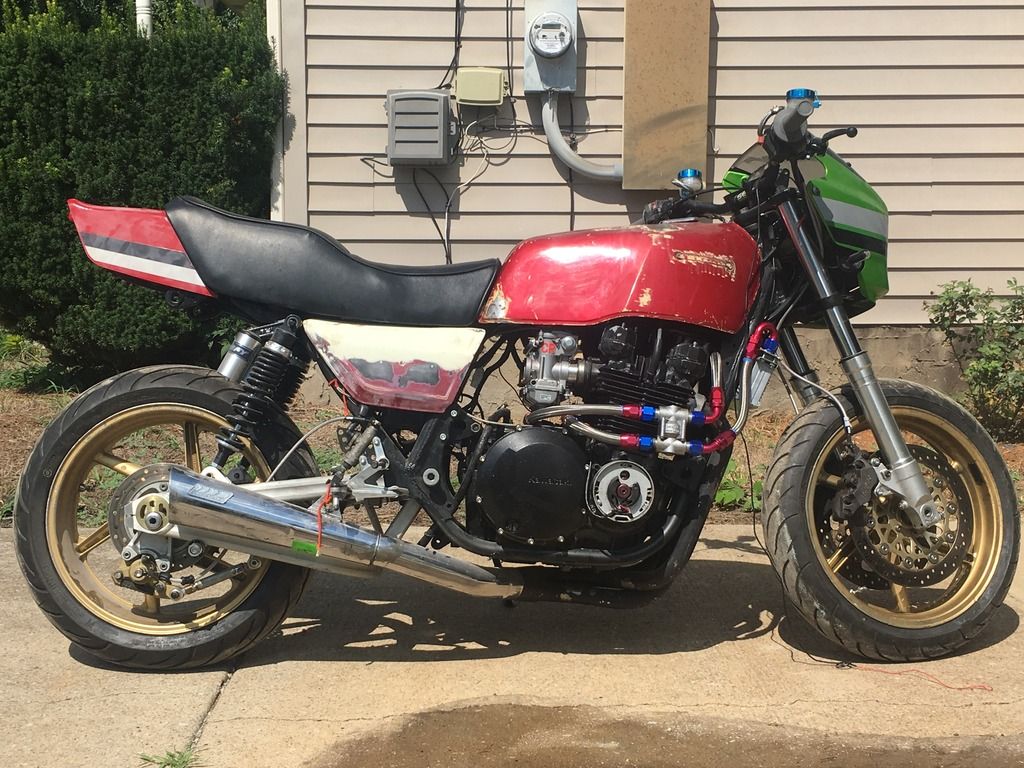
I am using 900RR forks and wheels. ZRX swingarm and front fairing. Supertrapp exhaust. I am also working carbon fiber side covers and a carbon front fender.
 
#2 ·
So work was done!! I already had it stripped down back to a bare frame.


Then I set it on the work bench and started removing the factory kickstand to make room for the 900RR kickstand. It will be put farther forward on the frame to make room for the shift linkage.


Then I marked and drilled two holes then welding in some spacers for support.


Then after smoothing some things out and a good rinse to get all of the dust off I got ready for some paint.


And this is where I left off for the day


#3 ·
So I fully intended to D some W last night after work but wound up working late instead.

The plan is to get the engine cleaned up and back in the frame. Then get the swingarm cleaned up and back in as well. I have to replace the steering stem bearings and then will paint the tripled and get them back on the bike. Once I have a roller again I will start on son of the truck stuff. I've got to finish my carbon fiber side covers and fender. Also have to get the dent out of the tank and then strip it down to bare metal.

In the meantime I found a set of ZRX shocks on eBay with a $100 starting bid. I bid a max bid of $175 and got them for $157.50. They normally sell for around $300 so I call that a good buy.


Sent from my iPhone using Tapatalk
 
#4 ·
Got a few things done in the shop today. I actually got to test out my new heater since fall has finally decided to show up and its in the low 40s right now. I'm terrible at taking pics sometimes because I get so focused but I will show you what I have.

I started with cleaning the engine up:


It was pretty nasty from just sitting in the shop for a year. I got it all cleaned up and also got the swing arm as clean as I could. All I was using was some simple green, shop towels, and a wire brush.


And all back together:


And with the new kickstand bolted up:


Looks like its going to work out perfect. I wont know for sure until I get it back on the ground. I also ordered new steering bearings and one of many ELR decals
 
#5 ·
Got a bit done yesterday. Nothing really picture worthy though. I got the wiring harness put back in and hooked up for the most part. I am waiting to get the front end back on before I hook up the headlight and gauges. I still need to make new set of plug wires and finish tidying the harness up.

Forgot to add a link for the progress before the build off started: http://www.customfighters.com/forums/showthread.php?t=115385
 
#6 ·
Due to some complaints yesterday, here is a picture of my progress from the other day:


Hey look what showed up in the mail!!


I got them installed with the help of my trusty shop cat


Also got my plug wires cut to length


How I left it yesterday afternoon


Had to work on the brakes on my truck this morning but will try to get out to the shop this evening
 
#7 ·
Rear sets back on


Front end and exhaust on


I found out a few days ago that you dont drop a needle bearing. They tend to bust apart.
 
#8 ·
I found the slow leak in both tires. The valve cores were loose. Tightened them up and temporarily mounted the wheels to check the lean angle of the new kickstand. It worked out perfectly. Also wound up gaining about an inch with the ZRX shocks. I think the stance is pretty spot on.

 
#9 ·
Was out playing army this passed weekend so nothing huge. I got the rear wheel mounted hopefully for the last time. I also wasn't very happy with my restarts so I bought a set of Sato knockoffs that are fully adjustable


Sent from my iPhone using Tapatalk
 
#10 ·
Got some work done today even though i am dealing with a semi hurt back. I got the front wheel mounted back as well as the handle bars and front brakes. I also got the rear sets mounted. They are much nicer than what I had on there


Also put everything together to make sure everything would fit with the new tank


Pretty well pleased with how it's all coming together


Sent from my iPhone using Tapatalk
 
#11 ·
So as you can see in the picture, I did get one side cover mounted. That one is salvageable and will be used. The other one is not so it will be re done. The chain guard for the swinger showed up today. It will be prepped for molding as I plan to remake it out carbon as well. Yes I am hooked!! Also just ordered a set of race tech springs at a much higher spring rate. The stock rate is .763kg and I went up to 1.1kg per racetech recommendations.
 
#13 ·
Got my new springs in. You can just barely see the line we're my forks used to settle at


Sent from my iPhone using Tapatalk
 
#14 ·
Got a bit more done tonight. My plan was to get the brakes bled but I had to take care of the rear brake pedal first. For some reason the way the pedal attached put the mc at a weird angle


So I used a very exact measuring device and drilled another hole


And now we are in business


So now the front and rear brakes are bled. Still having issues with the clutch but I believe that the slave cylinder is the issue. Even with a new set of seals I can still hear air moving in and out when I pull the lever. Off to eBay I guess


Sent from my iPhone using Tapatalk
 
#15 ·
I have a working clutch now. Also almost have the dent pulled out of the tank. Gonna get some more propane after Christmas and will start on the composites


Sent from my iPhone using Tapatalk
 
#16 ·
Got the chain back on as well as the oil cooler and the carbs. Also replaced the nuts on the rear sets with some nice Allen key caps


Sent from my iPhone using Tapatalk
 
#19 ·
I'm thinking about getting rid of the oil cooler t stat and going with smaller braided lines. Thoughts?


Sent from my iPhone using Tapatalk
 
#20 ·
Played around with some clay


And got the chain guard gel coated. Hopefully it will cure over night so I can lay some fiberglass. Then on to carbon.


Sent from my iPhone using Tapatalk
 
#21 ·
Chain guard wetted out


Side covers in gel coat


Sent from my iPhone using Tapatalk
 
#22 ·
Did some work on pulling the massive dent out of the gas tank


It took three days, lots of frustration and a couple of broken dent pullers. I finally was able to pop the rest of the dent out with compressed air


It's still got a minor dent but that will pull easy.

Shiny and fdup were right. The oil cooler lines and t stat look good once the body work is on


Sent from my iPhone using Tapatalk
 
#23 ·
The gel coat on the covers wound up bubbling up. I am out of gel so I had to order more. Once it gets here I will try again. The mold for the chain guard came out perfectly though. I have to do some trimming before I can lay up any carbon. Hopefully get some time this weekend to get it layed up.
 
#25 ·
Picture less update time

So I've been thinking about the chain guard and have decided to scrap the mold. Not because it isn't a good mold and won't work but because it's so narrow it is hard to get the resin spread evenly. Instead I will be doing an overlay. This way it will still be a carbon part but should be much easier to do. I figured I would wax the chain guard and then a few coats of pva just like if I was making a mold and the carbon should pop right off.

Also, I have worked out my front fender. I found a zrx400 front fender on eBay. It has a nice profile and is made for a 17 inch wheel. The only issue I might have is that the zrx400 runs a 110 width tire. Worse case is that I'll have to widen the fender a bit


Sent from my iPhone using Tapatalk
 
#26 ·
Got some work done.

I started on the fender first. It had some small damage that I had to fix before it was ready to be molded. I reinforced the back of the fender where the cracks were before I tried to fill them.


Once that was sanded smooth I took 400 grit to the entire fender to get a consistent smooth finish.


Then a couple of coats of was and PVA


Then some gel coat


And there it sits till the gel coat cures. Once it does I will lay some glass

Also layed up some carbon


And moved my ignition to right under the tank


Sent from my iPhone using Tapatalk