Custom Fighters - Custom Streetfighter Motorcycle Forum banner

Mcantar's Busa round 2!

14K views 76 replies 3 participants last post by  mcantar 
#1 ·
Yeah yeah, this shit again.

So for those of you just joining us, I bought this bike bone stock for last year's Buildoff and took it from this:


To this:


And that ^^^ is where we're starting this time.


Full specs and info can be seen in last year's thread (link in my sig), but the basics are this:

-2008 Busa
-Big turbo
-B-King trips
-Custom tail


This year the plan is to basically clean it up and squeeze a bit more power out of it. It'll be getting a redesigned tail, maybe new trips and bars, and some engine upgrades however I haven't decided how far I'm going with that this year yet. Looking at some other various bodywork... belly pan, fenders, that kinda thing. Also planning on doing a new wiring harness from scratch because clean wiring makes me moist, and hopefully by the time I do that I'll have finished designing my Keyless Ignition Module and will be able to work it into the bike. Probably doing some engine painting and frame powdercoating and whatnot too.

A little note on the internals.... was planning on bulletproofing the top and bottom end, but due to the fact that I have 5 active builds, 2 in the Buildoff, and have been living off savings since May (really since April) I'm just going to be doing the top end this year. Should hit mid-high 300's and will be shooting for as much as can be had next year (probably end up being around 460-500ish).


I'm still waiting on most of the important shit as almost everything is coming from Europe and I'm too cheap for fast shipping.

Sorry for all the words and shit. I know it's hard for you guys.
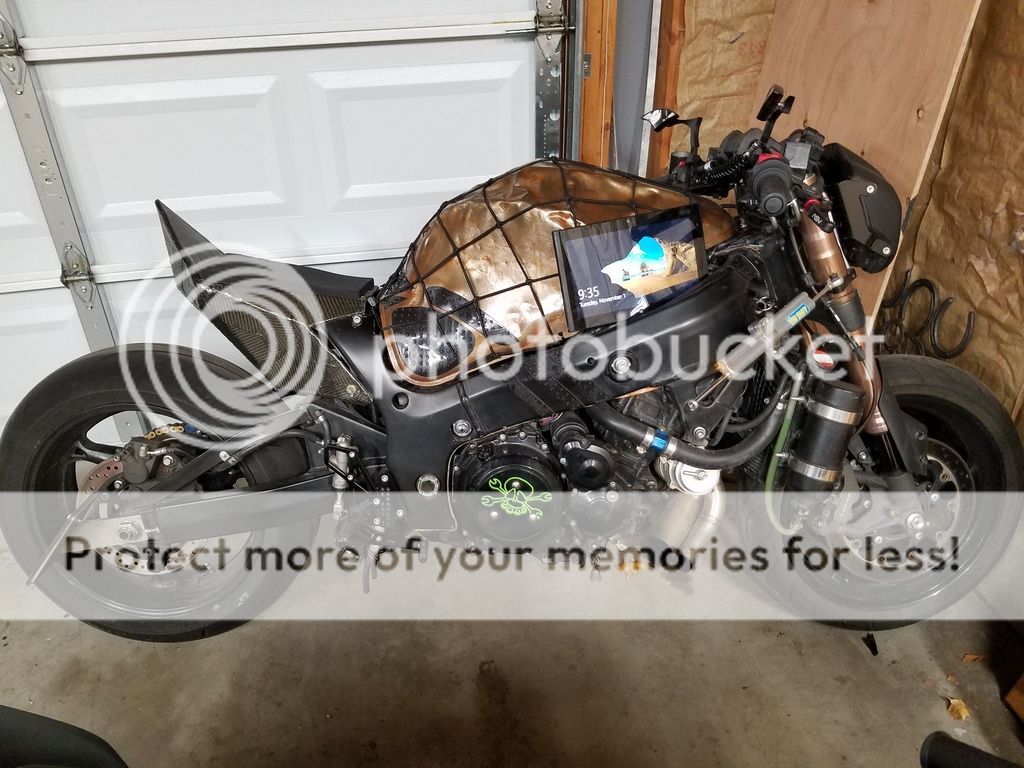
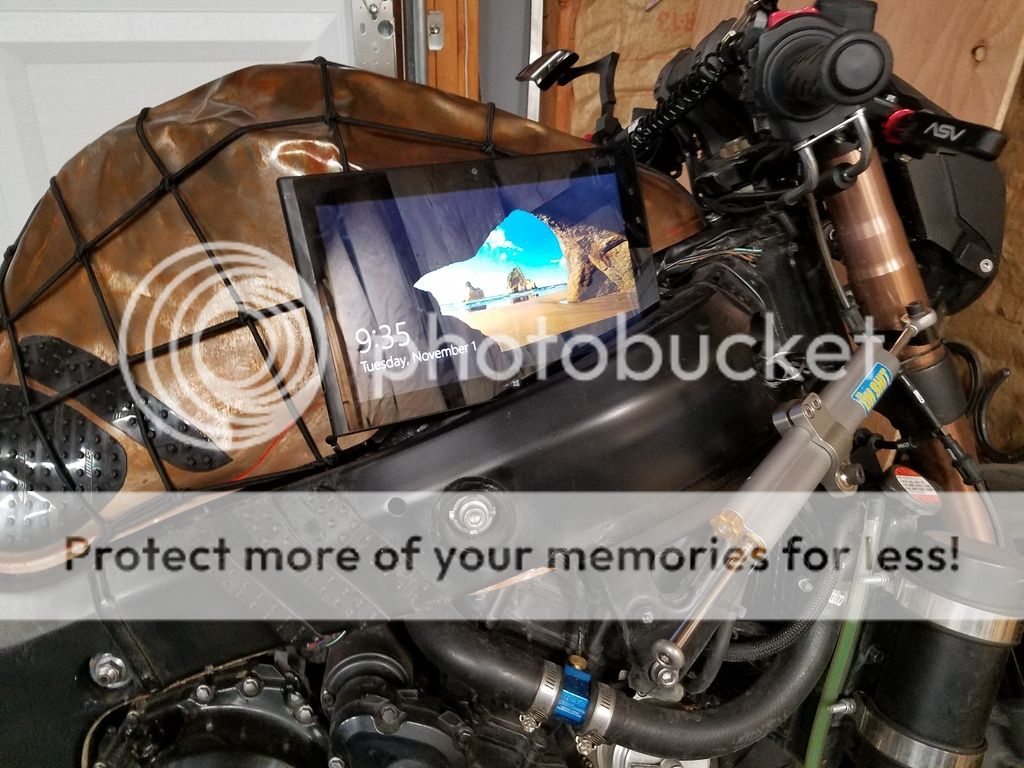

Proof of life.


Parts List:
- 2008 GSX1300R Hayabusa: $5000
- Build cost to date: $3200(ish)
- Ohlins SU406 rear shock: FREE
- B-King axle blocks: FREE
- APE valve seals and adjustable cam gears: FREE
- APE heavy duty head studs/nuts: $130
- Heavy duty stainless valves and springs: $470
- Various gaskets: $120
- Tail unit: $250
- Seat material: $36
- Pressure switch for rear brake: $20
- Clear clutch cover: $250
- Replacement B-King upper triple: $180
- Billet handlebars: $220
- EK ZVX3 11,100lb tensile strength chain: $130
- Sprockets: $60
BUILD COST FOR THIS YEAR: $1866
TOTAL COST: $10,066
(Disclaimer: Parts that I already have laying around on the shelf that weren't purchased specifically for the Buildoff are being counted as free. Many of them came from a bulk purchase that I made of a bunch of Busa parts, which I sold some of and got back more than I paid for all of it).
 
See less See more
4
#2 ·
So being that it was 9ish in the morning and I had nothing to do today I got to work.


First thing's first, start stripping shit.


Since most of the big stuff isn't here yet, I threw in some bling I had laying around.


Trying to decide where to mount the adjuster.
Either here:


Or here:


Then I threw some different axle blocks in from a B-King swinger I have on the shelf. Because bling. Also it gets rid of the stupid license plate bracket that I've always hated.
Briefly considered sticking the entire B-King arm in the Busa frame, but it's too wide and the shock mount would need to be moved and if I'm gonna do that much work it isn't gonna be for a B-King bit.


The rear end was pretty grungy, so I cleaned half of the wheel and sprocket.


And that's pretty much it for today. Had other bikes to work on and there's not much else to do other than pull the engine out.
 
#3 ·
Sorry for the lack of updates, been deep in the Colorado mountains hunting since the 3rd with no connection to the outside world other than once on a mountain top that happened to have cell service somehow. Just got back and showered... nice to be able to wash my hands after pooping again.

So bad news.

The French cocksuckers (Furax-Bikes) I was ordering parts from refunded my payment and said, as best I can translate, that it was too expensive to have their manufacturer in Germany send them the parts and then them send it to me and that I need to go to them directly.
They didn't bother to tell me who their German manufacturer was though, and I haven't been able to find anybody else selling the particular tail section or headlight mask I wanted.
I re-ordered the stuff and sent them an email asking them to forward it to the Germans, to give me their contact info, or to have them just send me an invoice for the additional shipping. They denied my payment and didn't provide any info. I had sent other messages through their website, through email, and through their Facebook page earlier before I left for my trip and none of it has been replied to.
Fuck them then.

So I found another place with another tail section who is happy to take my money. They're the same people who made a handful of the parts on MAD Kuusaa's Destroyer 1, so it's gonna take some additional work to make sure it doesn't end up looking like a copy of that bike. I don't like their tail section nearly as much and it will take much more work to turn it into what I want, but I can live with that. The other bad news about that is that the shipping timer is now reset and it'll be another few weeks before I get it. Oh well.

I had called my engine tuner guy on my way out of town and discussed plans and part. We're gonna swap the Ti valves for stainless ones, throw some heavier springs in, put the intake cam on the exhaust side and a bigger cam on the intake side, with a handful of other upgrades thrown in for good measure.
I asked him to email me an invoice so we could get the stuff shipped and have it here when we both got back from our trips (he's out till the 16th or something like that). Never received that invoice, so it looks like that's gonna be delayed too.

On the bright side some stuff I had on eBay sold while I was gone, so that frees up a few grand for the Buildoff.


Speaking of bright sides, I'm looking at these for the headlights. The price hurts, but they're nice and small and at almost 1,000 lumens a piece I shouldn't need many of them.


I'm tired as shit. About to go add the cost list into the OP and then go to bed. Should have an update on this or the B12 tomorrow.
 
#4 ·
Finally got a hold of my tuner today. Parts ordered and cost list updated.
 
#5 ·
So the bits from Germany have made it through customs and should be here in the next week or so, along with a replacement top triple and a liquid intercooler. Dropped off a spare head with my tuner along with some stuff I had that goes in it and he should be taking it off to the machine shop this week.

Went out to the garage today and did a lot of undoing.


Love this view...


I forgot how much of a pain in the ass that fucking turbo/header is to remove (and install). NO room for anything. The turbo is in the way of the header bolts, the wastegate is in the way of the turbo flange bolts, and the header and turbo block the wastegate bolts. The few bolts you can get to you can only get a wrench or allen on, no sockets, and can only turn them one face at a time. It's like a horrible fucking Rubik's cube.
But, after an inordinate amount of time and curse words, off it came.


Then I loosened up the wheel and was gonna work the chain off the front sprocket when I noticed how stiff it was. Didn't want to replace it, but it looks like higher power = higher chain wear (who'd have thought?). If it doesn't hang straight under it's own weight it's time for a new one. By the way if any of you are looking for a new chain tool, the Motion Pro PBR is awesome.


Here's the reason for the replacement top triple.


Some of you may remember my trip to Tucson during last year's Buildoff. If I recall correctly I got the bike streetable on a Thursday and then rode it 950ish miles the next day with no real testing other then dyno time before hand. Because of that, I went over every single bolt I had touched with a torque wrench and made triple sure that everything was buttoned up as it should be.
With triple clamp bolts (and other pinch bolts for that matter) I usually go off feel as they really don't take much force and I have a pretty good feel for that stuff. Well, not this time... I threw an allen socket on the torque wrench (which had been recently calibrated), dialed in 16.5ft-lbs or whatever it was, snugged it up and SNAP. Rechecked the torque settings and it was good, no idea what the fuck happened.
Didn't have time to source a new one before my trip so I just kept an eye on it. It didn't budge. Then other things took priority and long story short I never addressed it. Even now 4500 miles and a number of wheelies, small jumps, and big potholes later it never budged, but I figure I really oughta do something about it anyway.


Debating what order to do stuff in. My tuner has like 30 bikes in his shop and only one other guy helping him, so his time is a rare commodity and I want to make stuff as convenient for him as possible. On the other hand, I don't like doing work twice. As long as the engine is out of the frame I wouldn't mind sandblasting and painting or powdercoating it, but he'll need it assembled to dyno it with the new head and boost level. Not to mention the whole wiring harness thing, that'll definitely take some time and I need to do that before he can do any tuning with it (though I do have a few other harnesses that could be thrown on there just for the sake of tuning it which might be the best option). And I'll need the bike as complete as possible to really be able to visualize stuff so I can do up the new tail section, but he'd probably really like to have a seat and a battery tray when he's on the dyno.


Think I'll start on trimming up a radiator this week to use for the liquid intercooler. There are some pre-mades out there but they're not cheap, and I have a few radiators laying around. Never tried doing such a thing before but it can't be that difficult. Been running it non-intercooled so far and it works fine at 3.3psi, but it'd be a good idea for the higher boost and will be a necessity for next year. I found a nice compact liquid intercooler that will go inline with the charge tube on the left side of the bike, now I just need the heat exchanger and a pump.
 
#6 ·
Brought a spare radiator and the Burger King triple in to work, but was being a bitch about DW'ing after I got off cause I was tired. Then the bossman radio'd over that he wanted to chat about a bumper I'm designing before I took off, so I figured I may as well do something instead of do nothing.


Learned last year these trips are an almost direct fit with the one caveat being the BK steering damper mount taking up the same real estate as the Busa tank. So off it came, and much cleaner this time.


Cutoff wheel...


Other angle grinder thingy (the changeable sanding pad that gets pinched onto a backing plate by the nut, never sure what they're called)...
EDIT: They're called resin discs and they're awesome.


Then a few minutes on the belt sander and a few coats of paint when I got home...


Probably going to do the frame in this color too. Maybe a little more gloss in it to get more of a satin vs. flat finish, but I like the shade of black it is.


Kind of embarrassing looking at the quick cuttoff and flap disk job next to it. What the fuck was I thinking?
I was thinking I didn't want to take away too much material and compromise the strength of it. Why I thought removing that nub would be what did it in, I have no idea.


Probably start chopping up that radiator tomorrow.
 
#7 ·
Things happened today.

Dropped by my tuner's shop while I was in the area, the head is coming along nicely.

And I had some packages waiting for me when I got home. The German parts have arrived... the moss foam seat pad is super nice, the other assorted bits are all there, and the tail looks good. It'll need to be modified on the front a decent amount to get it to fit, but other than that I'm almost tempted to leave it as is... almost. Different look than I was going for, but it's not a bad one.
I held the tail up and got a good visual but couldn't be arsed to mock it up for real, so here it is sitting on the Bandit because if I can't put it on one bike I may as well put it on the other.


My liquid intercooler came in as well, but it's too big to use. Or too long to really work anyway. Have an email in to the seller asking if they can make a shorter unit and if I can do an exchange if they do, but if not I'll have to cut it down like the radiator I'm using for that system.


Speaking of the radiator, got a bit done on it. Chopped all the tabs off, removed the smaller fittings, moved one hose fitting from the back of the tank to the side, moved the other one from the back of the other tank to the bottom, moved the cap to the other tank, patched up the holes, and tacked it all up. Should be done by the end of the weekend.


#8 ·
Accidentally bought a fancy set of handlebars I've had on my eBay watch list for like a year. Whoops.
Also have a smaller intercooler on the way. The one I got is 13.75", this new one is 11"... I'm really hoping that's enough of a difference. That's the smallest one I could find and it has to be on there, and the "proper" Busa cooler-integrated plenums are in the area of $2000... fuck that. Unfortunately I looked over the first one again and there's no way to trim it down without cutting into the piping, which would mean I have to cap off each individual pipe, and fuck that as well. Have put in for a return of the first one.
 
#9 ·
Build has basically been waiting for parts, tools, and other people's work to be done.
I had a big pile of parts on their way, but 4 of the last 5 I received were wrong. One of which was the special engine mount socket that I needed to pull the engine this weekend, so that's not happening until next weekend now.

In the mean time, a tiny update for the sake of keeping it alive.


The heat exchanger for the intercooler is done and just needs to be finished up and painted. Will get pics next time I go to the garage.

The head is at the machine shop and should be done sometime this week (which is why I was hoping to bring the engine to my tuner this weekend).
I dropped by my tuner's shop earlier this week and snapped a couple pics of the shinies.

Oooooohh


Aaaaaahh


That's an expensive fucking shelf for how little them thar bits are.


Came home today and my blingy bars showed up. Went with these ones as I liked the shape better than the German ones I was looking at, they're $100 or so cheaper, and the German ones are the same ones on the Destroyer and I didn't want to be too similar.


Finish is ok. I'd be really annoyed if I was leaving them raw, little nicks and scratches all over. But they'll get painted black when everything else does.


Likely source of the nicks and scratches (shavings at the bottom). I gave you that much money and you couldn't even clean yer shit before packing it up?


Decent bit wider than the superbike bars I was running. Really hoping I don't have to have new brake and clutch lines made.


The mounting holes for the risers on the bottom of the bars are 90mm on center. The riser holes in the triple is 95.6mm. Luckily, the risers themselves have 10mm of material to work with on either side of the holes, and I'm thinking I want them shorter anyway. I'll throw em on the mill at work on Monday, shave them a bit and slot the holes.
 
#10 ·
Couldn't let the weekend go by without getting something done, so I stuck a tank on there and mocked up the tail.
I grabbed this tank because it happened the be the closest one. I might chop up another tank and weld some bits on this one to cover up the frame gap, or I might use the old rat-rod tank from last year... not thinking about it yet, I'll let the rest of the bike come together first and see what it's asking for.

Lobbed a chunk off to start...


Now able to actually get up to the tank (those corners hit the frame), I spent a little time with a marker and a hand file and got it close enough. The tail should sit 6-7mm or so off the tank and the seat pad will probably hide the edge a bit anyway.


Then dug around the garage for something that would hold the tail in place, in the position I wanted it, without being too tippy. Went through like 5 things before settling on a medium sized pry bar. I really need to get some scrap door trim or something for stuff like this.

Anyway, I like it here.


Then I got to pondering about the subframe. I think it'll work out really well using the upper subframe mount as what will be the rear mount for my subframe, and the frame crossmember as the front mount. This would keep the entire thing encapsuled by the tail so no bars sticking out any which way, and as a bonus I'll be able to shave off the OEM lower subframe mount and probably will end up being able to blend the arc of the frame with the tail itself. Plus, it'll keep that Ohlins shock nice and visible, and vain as it may be I kinda like that.


Now I need to do some shopping around. The fancy billet bars are outshining the rest of the bar stuff... the OEM switchgear looks like absolute crap on there. If I were looking at someone else's bike and saw it set up that way I'd think "Man, all that work and thought put into everything else and he couldn't have done something about those handlebar controls?"... so I'm looking at options. The Motogadget m-switch looks nice, but seems to require an m-unit to function and those are stupidly expensive just for the sake of tarting up some switches.
The German folks I got some of the other bits from make some nice looking switch units as well, for a little cheaper than the m-switch even, but I need to order a significant amount of stuff from them to justify the $50 shipping.
Plus the throttle tube assembly. There are some decent ones out there but it seems that all of them are either sub-$20 and sketchy looking, or really well made and in the $100-150 range.
 
#11 ·
Took a little time on lunch today and got the mill all messy and shit.


Shaved off the bolt-head holes completely, as the other option was to just open up one side for the slot and that would just be silly. Also took a few mm off the overall height.


Then flipped it over and slotted out the holes for the bar section bolts. Couldn't find tooling that was just the right size for the hole's bore so I went a hair over to the outer diameter of the chamfer, centered it up, plunged the hole first, and then traversed out the slot.


They're now 2.95mm long + whatever the difference in diameter between the original hole and the tooling is... with 0.01mm of runout along the length because I didn't lock the X-axis down.


Worked out nicely!


Still might take a few mm off the top of the risers, but I'll wait til I get it all together on the bike and see where it really sits first.


Also, my liquid intercooler came in today. Gotta figure out where the fook to stuff it. A little long to go inline with the old charge tube, but possibly could be shortened a bit to make it fit a little better.


Or maybe if I can work some magic with the charge tube I can get it to sit above the stator. But then it's closer to the engine and thus hotter. And I don't quite like it there.


Though I do have a thought about carving it into the tank. That might go somewhere.
 
#12 ·
HUGE rep to Seb for this. Sent him a spare OEM clutch cover I had laying around and it's here ready to go less than a week later :shocker:
Dude, thank you.

Can't wait to see it on the bike! Little ways off from that though, and I have my own touch to add to it first :fire:


Also today during my morning poop I accidentally won best offer on some handlebar bling... a 2-button billet switch unit... so those should be here soon. The buttons are momentary, so I'll either have to swap them for latching buttons or wire them into the harness through latching relays, neither of which is a big deal. Going for a minimalist look on the bars so unless I need control over something that I haven't thought of, those will be the only switches on the bars at all(other than the safety lanyard killswitch if I don't find another home for it).
On the same subject, I emailed my new US-dollar-loving German friend asking about throttle cable housings, and after some language barrier clarification he replied with "Yes I know what you are asking, I have ordered it for you." No idea what it looks like or how much it is, but I guess I have a throttle cable housing now :D

Oh, and my tuner called, the head is ready to go. I'm still having troubles ordering the right fucking socket for the engine mount spanner nuts, at this point I'll just have him pull it. Gonna try and drop it off with him sometime this week.
 
#27 ·
Can't wait to see it on the bike! Little ways off from that though, and I have my own touch to add to it first :fire:

Well we're halfway there. Visited my buddy's laser shop today, ran a few test runs and then burned the final part out of cast acrylic... SHOULD hold up to oil/heat, from what I'm seeing online. Wanted to use the fancy stuff that Seb provided with the cover but it didn't etch well, the CO2 laser had very little effect on it and the fibermark laser basically printed on it (markings were black, which isn't conducive to being backlit).


Waiting on parts in the mail to finish it off and then mount it. If it works as intended the Skully will glow green.


Happy to say that I don't think I'll need new brake lines on the front end. If I move the Motogadget switch to the right side, use these grips that are a bit longer than the throttle tube, angle the masters down to the angle that matches my grip, and mount the mirrors on the bars as planned then I should be JUST close enough to use the lines I've already got.


End up with this much slack at full fork extension... should be enough I think.


Bars are starting to look pretty good overall though. Would prefer the switches on the left side, but I'll get over it... seems less weird to have my starter button on the left than to have my high-beam on the right, not sure why.


Have a waterproof 30A toggle that will either be my ignition, or the cutoff for the RFID ignition if I can ever figure that circuit out. Think this is a nice spot, accessible but decently hidden. I'll drill a hole for it.


Picked this guy up too. Bike has 7 or 8 fuses, this holds 10 so it can all be centralized when I do the harness. And the LED's light up if a fuse blows which is pretty convenient.
I was really hoping to find a box of miniature breakers so I can totally eliminate fuses on the bike, or at least the breakers themselves to build a box around, but couldn't find anything suitable.


Thinking I'm gonna have to jump and get a real throttle tube. Tightening the bolts on this one gouged the shit out of the metal underneath the bolt head... and I didn't crank down on them by any means... shitty Chinese alloy. I would hate for the throttle cables to wallow out the holes they live in over time and end up with unfixable slack. New one is on order.
 
#13 ·
#14 ·
Today has been a very long, busy day.

Loaded the bike up into the truck this morning... quite the pain in the ass when its 8°F out and the truck bed is iced over... and hauled it down to QuikCycles.

My shelf was looking pretty good!


We popped the engine out and I left it there and took the frame with me to work for some trimming that only ended up getting halfway done.
Built some truck shit and then headed out early to make it back to the tuner's shop before he closed up for the weekend... that didn't quite happen, but he stayed late. Stuffed the engine and the old parts into the back seat and headed home (with a quick pit stop on the way to pick up some paint).


Box of old bits. Might make someone a Christmas present out of these.


Here you can kind of see the quick chop job on the lower subframe mounts... kind of blends in with the shock a bit.
Side note... threw the bars on along with the brake master for the sake of loading/unloading in the truck. I straddled the frame and the bars don't feel as wide as they had first seemed, which is good. I still think they're a few mm high, but I'll still wait til they're fully dressed to decide if I'm gonna mill some more off the risers. It definitely reinforced the thought that the OEM axial masters look shitty and out of place on the bars though... fuck, lots of add-on costs popping up on this one. Speaking of, the fancy billet controls came in today... fastest shipping ever! I'll get pics up next post.


Stripped everything off it, with the exception of the lower triple. I figure I'm painting it anyway so overspray isn't really a concern, and this way I don't have to fuck with bearings or stupid spanner nuts.
Also pulled the Ohlins shock and stuck an OEM unit back in so if I fuck it up I won't cry myself to sleep tonight.


So anyway, first order of business was to finish up the chop job. Smoothed out the (formerly) lower subframe mount area and the seat bolt extrusions. Still a tiny amount of blending to do, but that can be done later when I have the proper tools for the job. I really hate doing this kind of shit at home, I've been spoiled with all the nice tools at work.


Sprayed everything off real good with the compressor, scraped off any thick crud I saw (mostly around where the chain lives), and gave it a bubble bath of degreaser.


After cleaning it all off I wiped it all down with acetone twice and went to tape off the bits that need it, but stuff was too cold for the tape to stick. So I brought it inside to warm everything up, which needs to be done for the paint's sake as well. Good thing the wife was already asleep by this point :D
Eh, she probably won't care anyway.


Tomorrow I'll paint the frame and engine, and if I have time I'll hit the other shit too like the clutch cover and bars and whatnot.
My stupid overpriced right-angle oil filter adapter should be here Tuesday or Wednesday, so I have until then to polish up the engine and frame and then it's all going back together.
 
#15 ·
Turned the heat up a little last night. I don't even do that when the family complains that it's cold :D

Parts were at a pretty good temp when I went to check today.


The garage was a bit low for painting at 48° so I turned the heaters on and started masking stuff off.


A bit after I started painting my coolant bottle showed up, so I disassembled it and threw the bits into the lineup. It's pretty well made for Chinese crap, better than I expected by far. The body is made from alum tube that's almost as thick as the endcaps, with actual gaskets between them too.


Came out pretty nice I think. The paint I used for the engine is just a tiny bit flatter finish than what's on the frame and non-engine bits.


Oh, here's the handlebar switch unit. I'll use one button for the high beam on/off through a latching relay and the other will probably end up as the starter button if it'll handle the amperage. I ditch the horn on all my bikes, and I don't use blinkers, so I don't think anything else needs to be on the bars... should keep the it all nice and clean.


Found a set of Brembo radials from a 2014 Panigale 899, they're on their way and should fit nicely. Both brake and clutch are around 1mm larger than the OEM Busa stuff, and I have no info on stroke... hope they work. Gonna need to figure out something for levers, but luckily the ASV's I have are in great shape so they should be easy enough to sell.
 
#16 ·
And back inside to stay warm so I don't have to keep the garage heaters on.

 
#17 ·
Got a package yesterday!


And inside was.................................................. another package :nuts:


And inside that one was...................................... more bling!


I've had some trouble changing my oil filter this last year... you could get within a couple turns of completely off and it would hit the exhaust housing on the turbo, and I've illustrated what removing the turbo involves earlier in the thread.
So, I bit the ridiculously overpriced $200 bullet and bought this thingy which relocates the filter 90°. The amount of ass pain this will save is well worth the money, but still... this thing is nowhere near $200 of material and machining time.


Anyway... dragged the bits back out to the garage and threw em together, excluding the engine, to drag down to the tuner's shop tomorrow. Tried out a trick I picked up from another member a while back (Shiny or Cookie I think?) while I was assembling, worked pretty well.


And cleaned out the threads. Every bolt on the bike will either be copper-slipped or loctite'd.


And stuck enough of it together to get it on and off the truck tomorrow.

 
#18 ·
Ah, progress. This build seems to be coming in waves of nothing, then lots of doing, then nothing again.

Throttle assembly came in. Giving the Chinese a shot on this before spending 5x the money on European stuff, seems to be decently made.
Pretty surprised, this thing made it all the way here from China in a week. Meanwhile my bar ends have been in transit for almost a month now.


Took the bike down to QuikCycles to pop the engine back in. Brought the turbo along with, and he gave it a prostate exam... stuck a borescope up the oil drain to check out the shaft. 'Twas time for a refresher, so apart it came and it's off for bearings and balancing.


Stuck the filter relocater on too. Old filter, just on there to plug the hole.


Then I took the now less-incomplete bike to work, I wanted to finish up an ARB compressor mount I was building this week and afterwards I figured it was time I do some fabrication on the Busa instead of just bolting pretty parts on.

Started with something easy. Don't need that annoying kickstand safety switch tab anymore...


Figured I may as well toss in that adjustable stand that's been on my shelf for months. More for the machined appearance than the adjustability.


Though now that it's on there, I think it sticks out too far when closed. The new stand is just a few degrees more bent compared to stock, and it's enough that it's kind of bothersome. Will see how it looks with all the other stuff on the bike.

Forgot to get an after pic of the kickstand + bracket after install. Nothing special, it's just smaller and blacker (giggity).


Then I fucked around with the tail again, but for real this time.

I like it here. Angle of the seat matches the front of the tank, an as a bonus the angle of the rear face kind of matches the angle of the forks. Was more concerned with the seat/tank bit as they're closer in proximity.


Made up some numbers and turned them into lines. Normally have more room to work but we had all the cold-blooded trucks stuffed into the shop tonight. You'll see why in a minute.


Turned the lines into codes.


Then turned the codes into parts.


Then the seat pan. Less pretty, but this is more intended to support my butt than to show off.
Forgot to clearance the sides so that the seat could actually fit over it, so that was done with an angle grinder and belt sander.


Then did a final test fit and glued it all together.


Was already 1am and I hadn't eaten today so I wanted to get home. Rushed through the welds and I'm not at all happy with them... thankful they'll be hidden.


Earlier today on the way to the tuner's shop it was nice enough to have the windows down.
When I went into my shop it was sunny out.
When I went to go fill up some fuel cans it was chilly, but still clear. Forecast said cold but clear.
When I went outside again to go home, it looked like this...


-1°F! That's kinda cold.

Wrapped the bike up before I left. Trying to keep water off the fresh-ish paint... cure time is 7 days, it's been 6ish.


Got home and unloaded the bike into the snow. I grabbed the bars and brake to go down the ramp and thought "Why are the bars tacky? Is the paint coming off?"
Then I repositioned my grip and thought "Did that hurt? Kind of felt like it but too cold to tell."
Then I repositioned my grip again and realized what was happening.


^Yup, that's my skin stuck to the bar. It's THAT cold.


Got the bike out, blew off the snow that had gotten on it during unloading with the compressor, and came inside for some hot chocolate.


Was thinking about working out how to attach the tail to the subframe, but fuck that I'm done for the day. It's already 4am and I have to be up in 3 hours.
 
#19 ·
Hmm... maybe?


Eh, this works better I think.


Did some CAD & coffee, and drove out to my shop.


Drilled some holes and stuck some nuts under them for the bolts that will hold the tail down under the seat, and threw the battery box together. Haven't quite worked out how to secure the top plate down, would like bolts but maybe velcro straps are the better option?


And the top bit. This sticks up along the top of the tail and gives me something to zip-tie all the electrics to.


And I thought it was cold yesterday.


That's -22°F on the dash there, and it dipped to -24° before climbing slowly to -9° as I got closer to town.


Gave it a few coats of paint when I got back, should be able to gently mount it up tomorrow. Coolant bottle needed another coat too, had a little gold shining through.

 
#20 ·
Little bit done today, nothing major.

Fitted the foam to the battery box, fits good and snug now. In fact, I can turn the whole thing over and shake it and neither the battery nor the cover piece comes out. Ordered some velcro straps to finish it off.


Torqued the new sprockets down and fitted the new chain. I've mentioned it before but I'm so happy with it I'll say it again... check out the Motion Pro PBR chain tool. Makes chains super easy, no fussing with pin alignment, no trying to squeeze the master link plate on with vice grips, just flip the block around and break/press/rivet as needed.


I really need to get a bigger torque wrench. Mine only goes to 80 lb-ft, so doing a front sprocket nut spec'd at 105 lb-ft ends up being more like "80 + a bit more = good'n'tite."
 
#21 ·
My master cylinders came in today. Were supposed to be here last week but the snow got in the way of that.

This shit again... but more this time. Ever see the movie Inception? This is like the postal version of that.

Package inside a package inside a box.


And what was inside the innermost package? Another one. 4 fucking layers of packages.


Look good. Can't figure out why these eBay scrapyard people feel the need to write their part ID numbers in plain sight in very hard-to-remove paint pens.


Looks much better.


Couldn't help myself, I mocked everything up on the bars... didn't get a pic though.
I thought the color would work but now I'm thinking they need to be black. Definitely need to get some mini reservoirs... the size on the clutch side is ideal.
Have a neat idea for the reservoir brackets too.

Unfortunately, the brake line is too short now by about 60mm, and none of the half dozen sets of stainless lines I have in the pile are long enough either. Hoping CORE Moto can lengthen just the top line that goes to the 3-way block, instead of having another set made.

Also of note, the switch unit I got doesn't quite fit. Thought maybe it was the bars, so I stuck it on 4 other sets of normal bars and still no good. I took the calipers to it and it came in at 21.4mm... 7/8" bars should be in the area of 22.2mm,. Have a message in to the seller for a return or an exchange for a Motogadget M-switch.


Then I figured what the hell, let's see how the big picture looks. Mounted the subframe and stuck the tail on (the pliers keep it from tipping back as I haven't bolted it down yet).
Different than what I had set out for, but I'm happy with the direction it's going.


Then the thought of gauges occurred to me for the first time since the teardown.
I like how it fits into the profile of the bars, but I think it sticks out too far. I'll see how it comes together with the headlight I haven't figured out yet, worst case the Koso will go to another bike or one of you guys and I'll get that half-circle Motogadget unit.


Need to order reservoirs, mirrors, and figure out levers.
 
#22 ·
Mirrors ordered... that one hurt.
I ALMOST got the cheapo versions of these from China that cost 1/3 for the set as the real ones do per side, but they were missing a couple minor but important design details, so I had to go with the real deal. I'm gonna be really fucking pissed if I drop this bike.

China versions:


What I got:
 
#23 ·
Reservoirs ordered (thanks Mikey), will pick up reservoir bracket materials when they show up.

Talked to the folks at CORE Moto today... no way to replace a line in the 3-way splitter block, they're swaged in... no choice but to do new lines. These fancy bars need to stop costing me money.

Also found this doodad. Not sure if I like it or not... or if it'll fit with my triple/bars... or if they'll even ship to the US... or if the company is still even functioning...
Would certainly make life a little simpler though.

 
#24 ·
Wellllllllll....... fuck. I drew up a sketch to the listed dimensions of the Motoscope Pro and it fits in that recess in the bars like they were made for it. I didn't want it to be THAT much better fit than the Koso.
We'll see. Maybe I can integrate the Koso into the headlight housing... probably not how I'd like though.

Have an M-Switch on the way to replace the switches I have. Should be here this week if Christmas postal-craziness doesn't get in the way.

Also found a great price on an ASV shorty that fits the Panigale brake master, so that's on the way. Just need to find one for the clutch side now.

If anybody wants the old ASV's (they fit a bunch of different bikes) or the Koso, let me know. Would be nice to offset costs a little.
 
#25 ·
Motogadget M-Switch arrived yesterday to replace the crap Motone unit. Fits perfectly.


Found a spot where the Koso actually doesn't look bad, and then noticed there was something rattling around in it. Popped it open and it looks like these capacitors broke off somehow? I'll try to fix it and if not I'll have a good reason to go for the Motoscope Pro.


Got family coming over for Xmas dinner so as usual I went to hide in the garage. Actually got a little done too.


Battery box finished off with the velcro strap in place.


Then I lined the top of the subby with some of the excess foam that came with the Shorai. The tail section is slightly concave (from the top), so this'll allow it to sit proper.


Then sorted the mounting holes for the tail and got it mounted up... just need to finish it off and make it look right, and attach the seat pad. Probably gonna wrap it in carbon once I finish off the shape.
Pretty happy with how it sits.


Thinking this is a pretty good home for the preload adjuster.


Had to mount the rearset to make sure it all fit together as it should. Might paint the bracket black, the bare alum matches the shock itself but not so with the frame and rearset right next to it. Easy enough to take care of later.


Then I figured I may as well stick the other side on and butt-test the seat. No pictures of the butt-testing, but it's SOLID! Bounced on it a few times and it doesn't even flex (shut up).
In other good news, the kickstand looks just fine with the rearset filling out that space.


From sitting on it, I'll likely need to raise the pegs one or two holes and will definitely be shaving the riser blocks down as much as they can go. Might even lower the front end a touch.
 
#26 ·


This is an older thread, you may not receive a response, and could be reviving an old thread. Please consider creating a new thread.
Top