Custom Fighters - Custom Streetfighter Motorcycle Forum banner

zero420's YZF600R fighter

56K views 111 replies 30 participants last post by  FIZZY1  
#1 ·
Hey Y'all,

Kinda new here. Been trolling the site, getting ideas for about a year or so. Never posted my own thread, just some comments here and there on others.

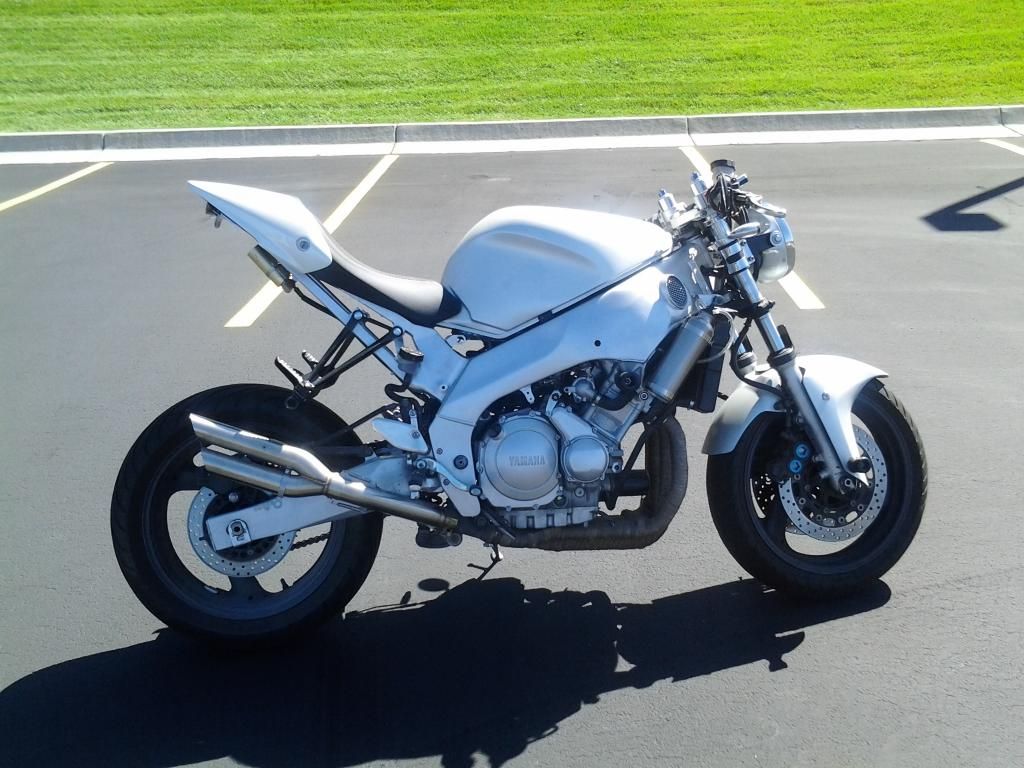
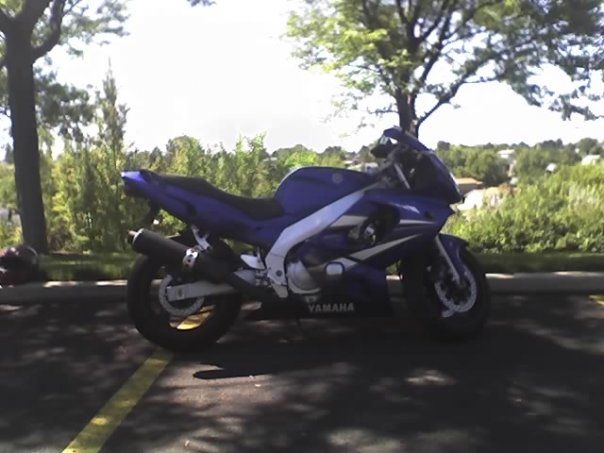
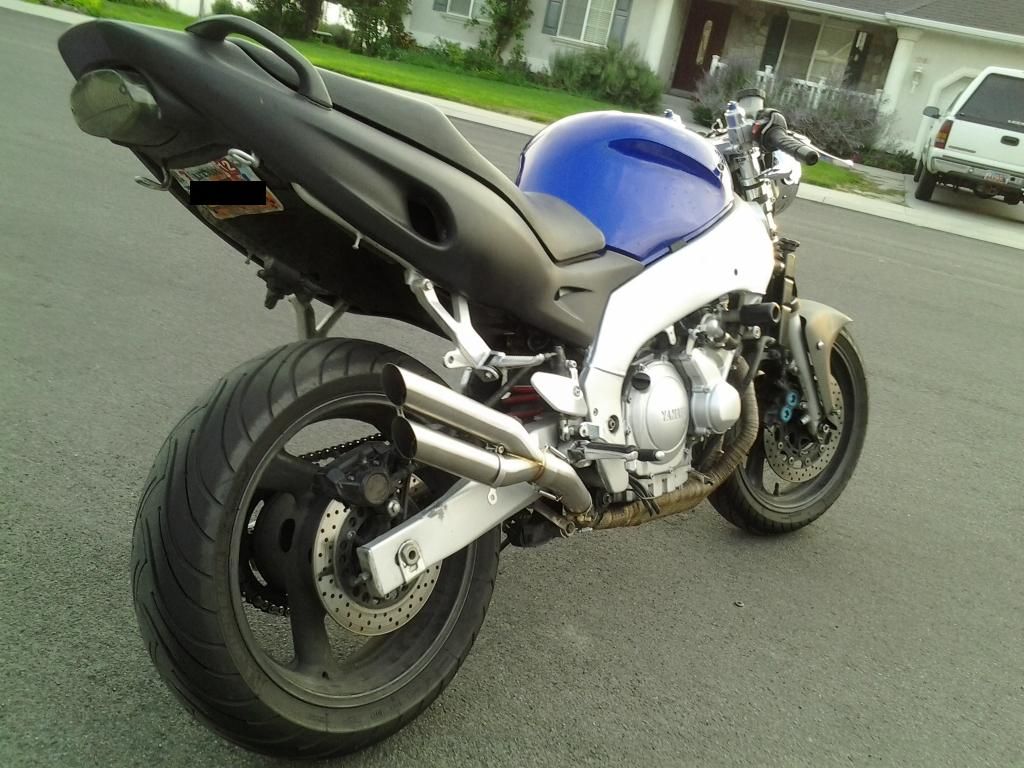
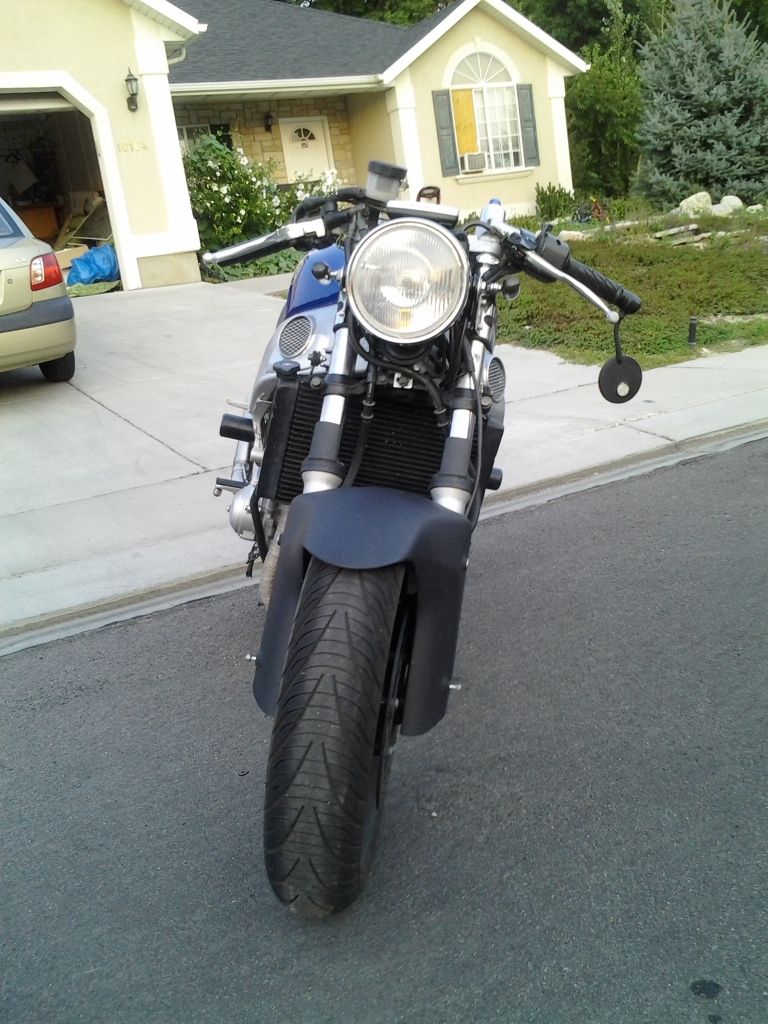
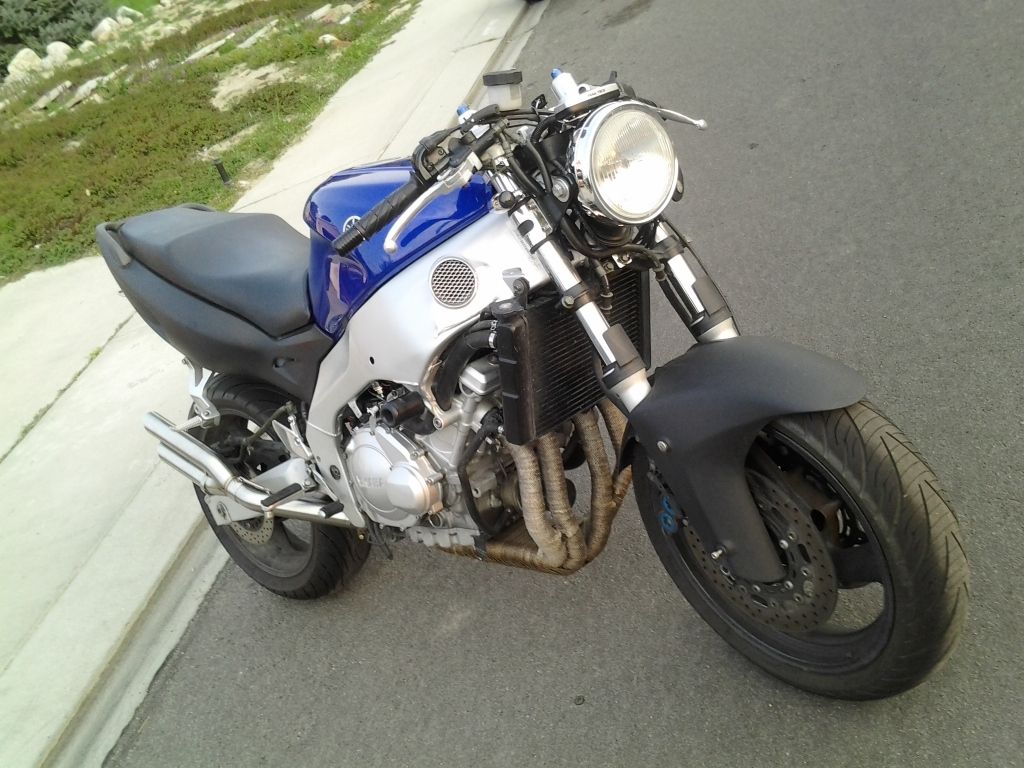
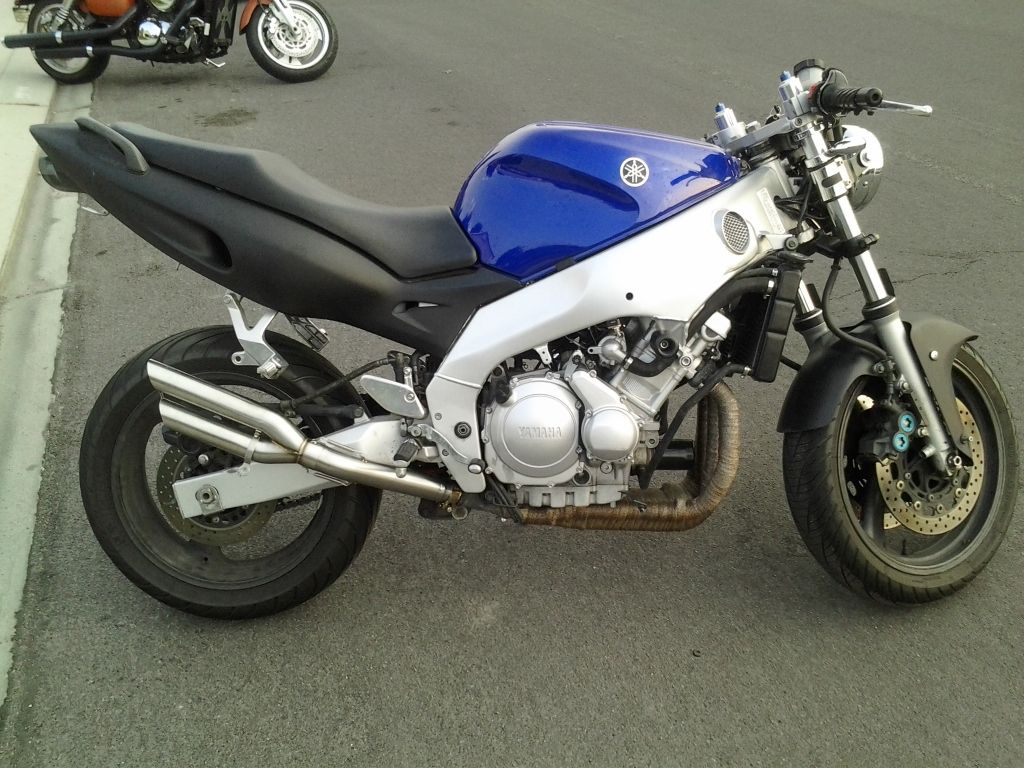
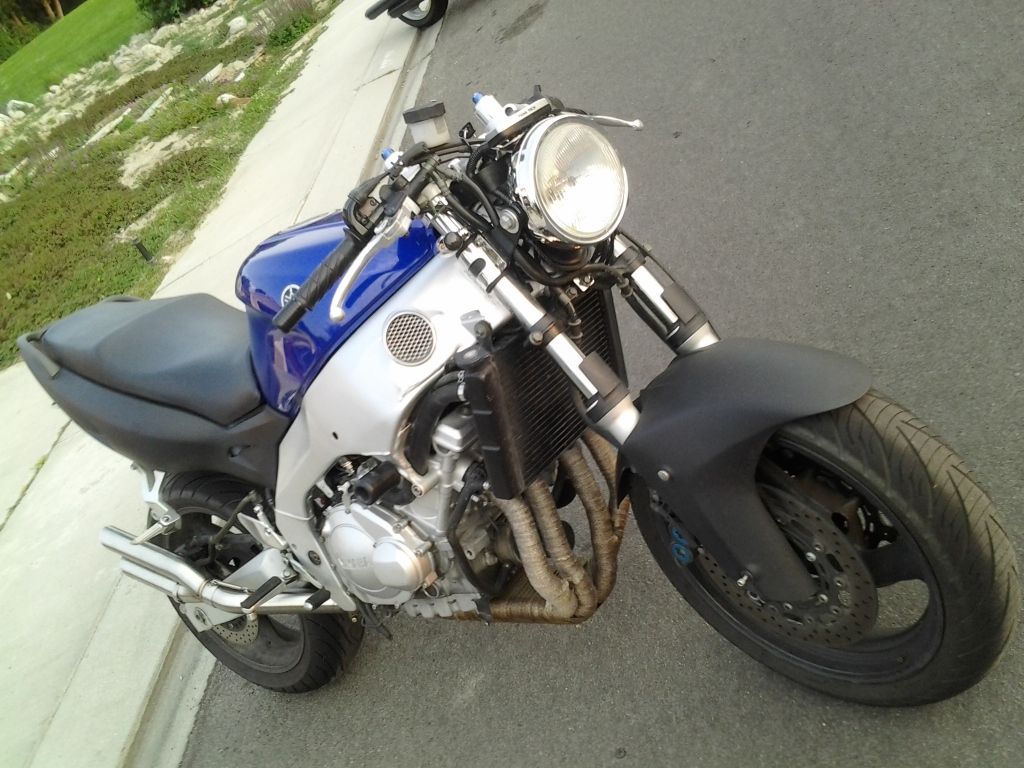
Well I figured it's about time for me to post one of my own for my fighter. She's a 07 YZF600R aka the Yamaha Thundarcat! Love her to death, but I love her as a fighter even more.

Adding on bits and pieces and projects as I go along, as long as my wallet will allow it.

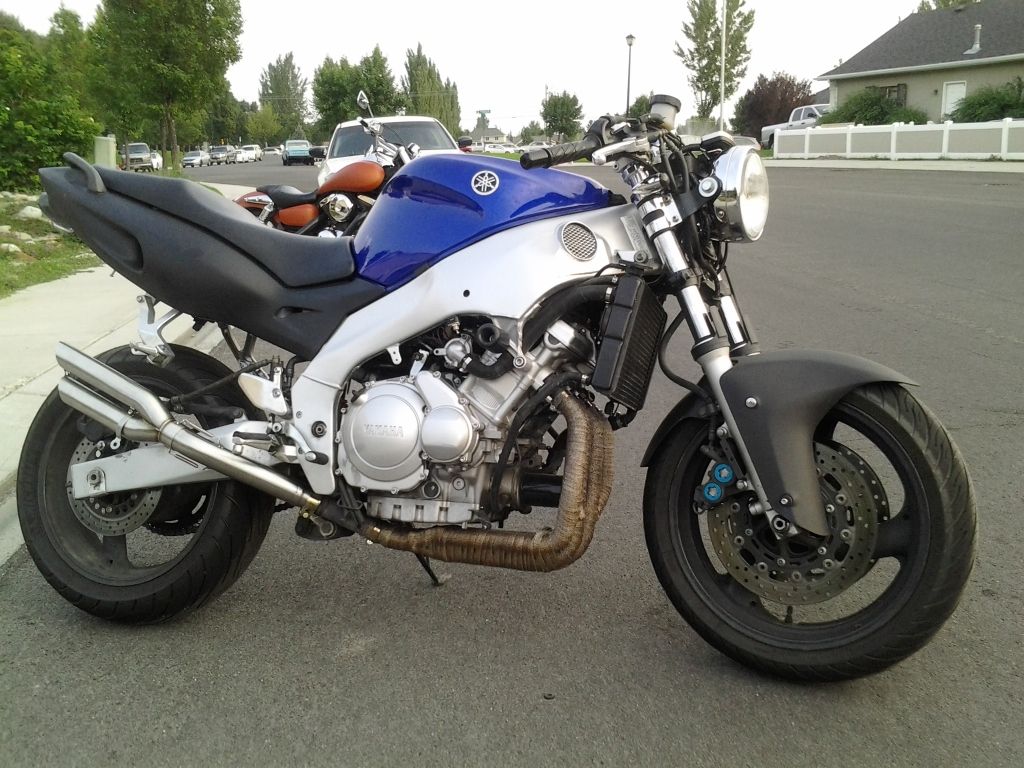
No major engine mods yet, just a DynoJet stage 1 kit.
Danmoto exhaust (fit for a R6, 02-04)
Wrapped the headers
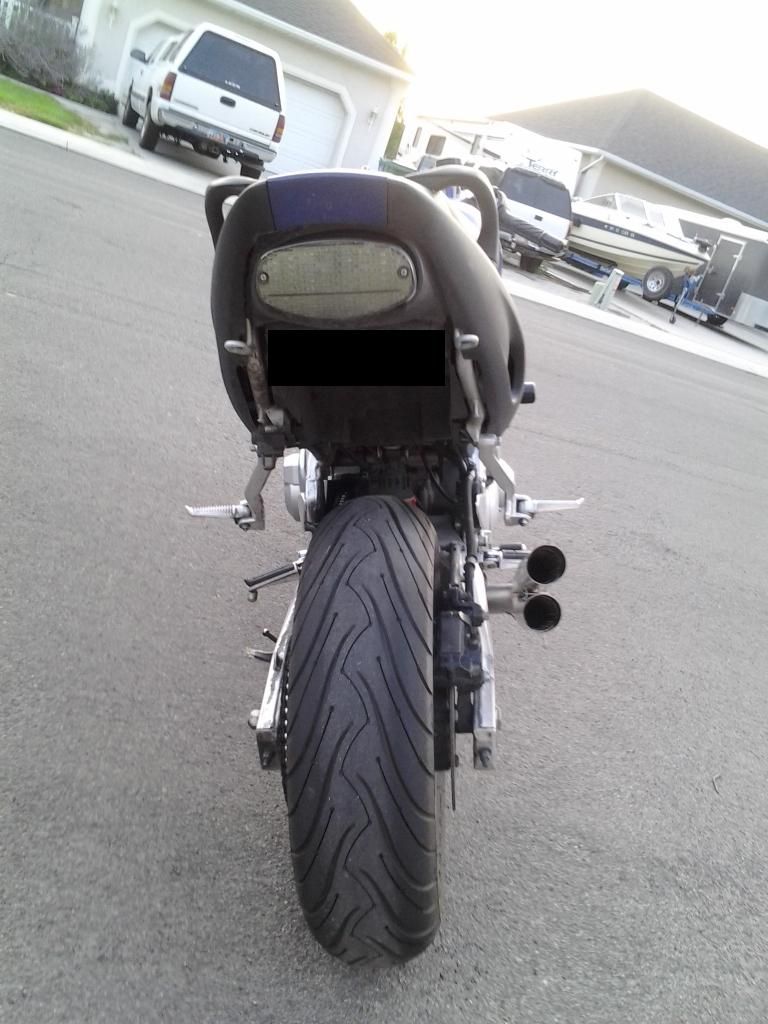
Universal Busa type dogbones to raise the tail 1"
Dropped the tripple tree 1.3"
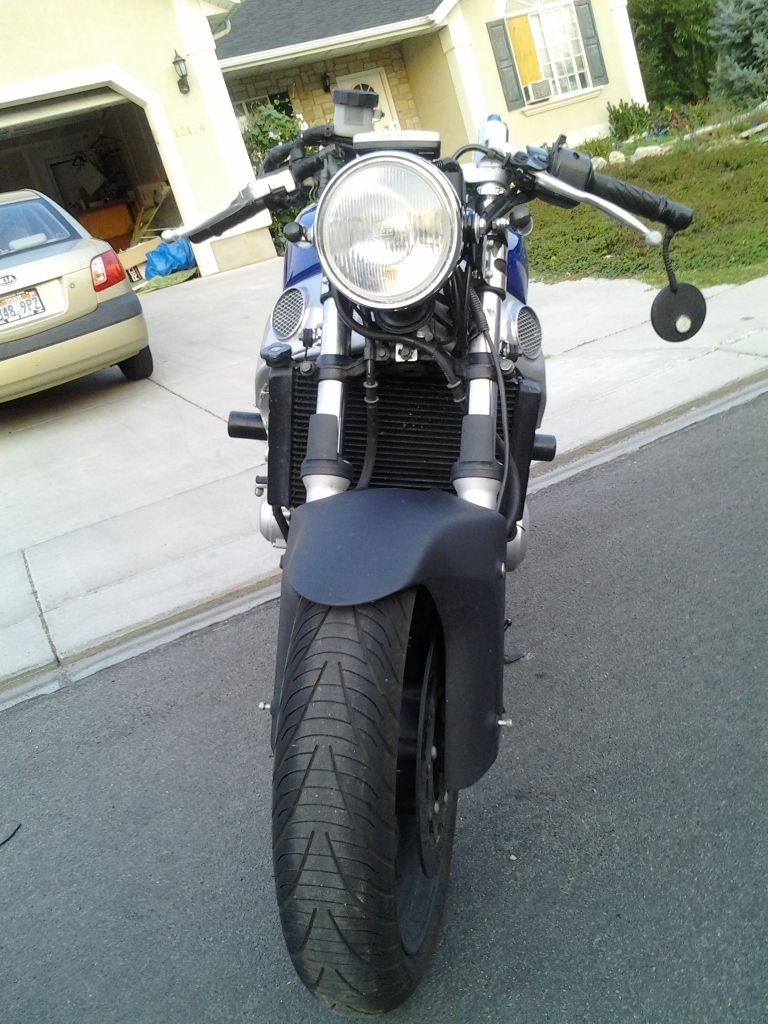
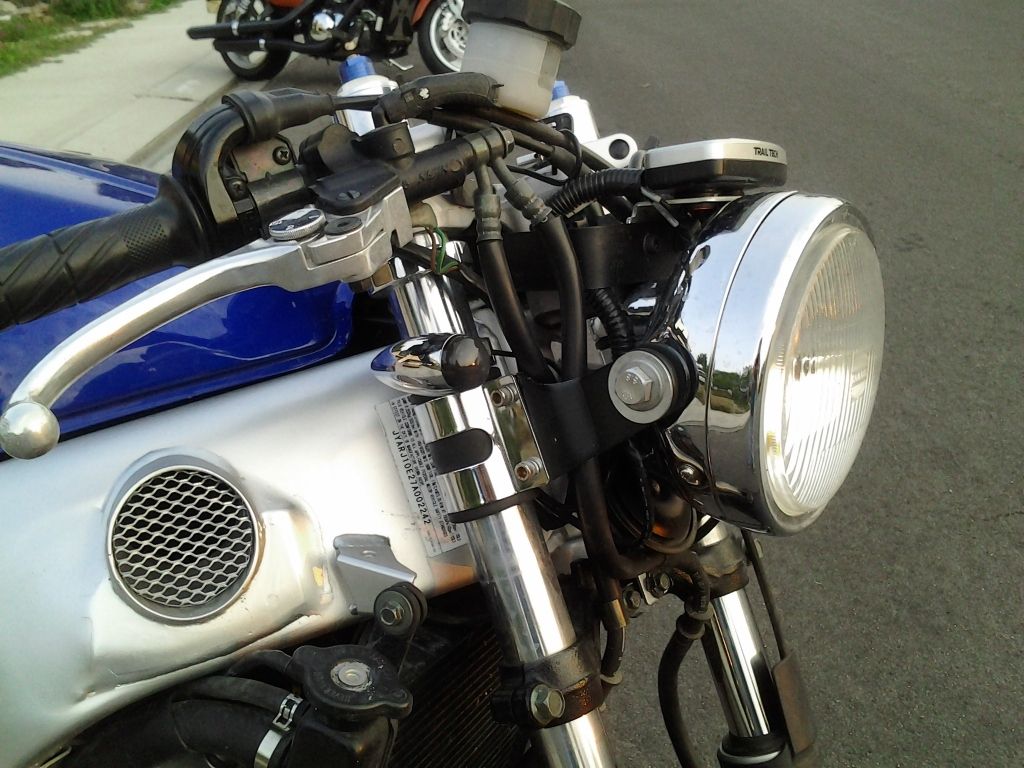
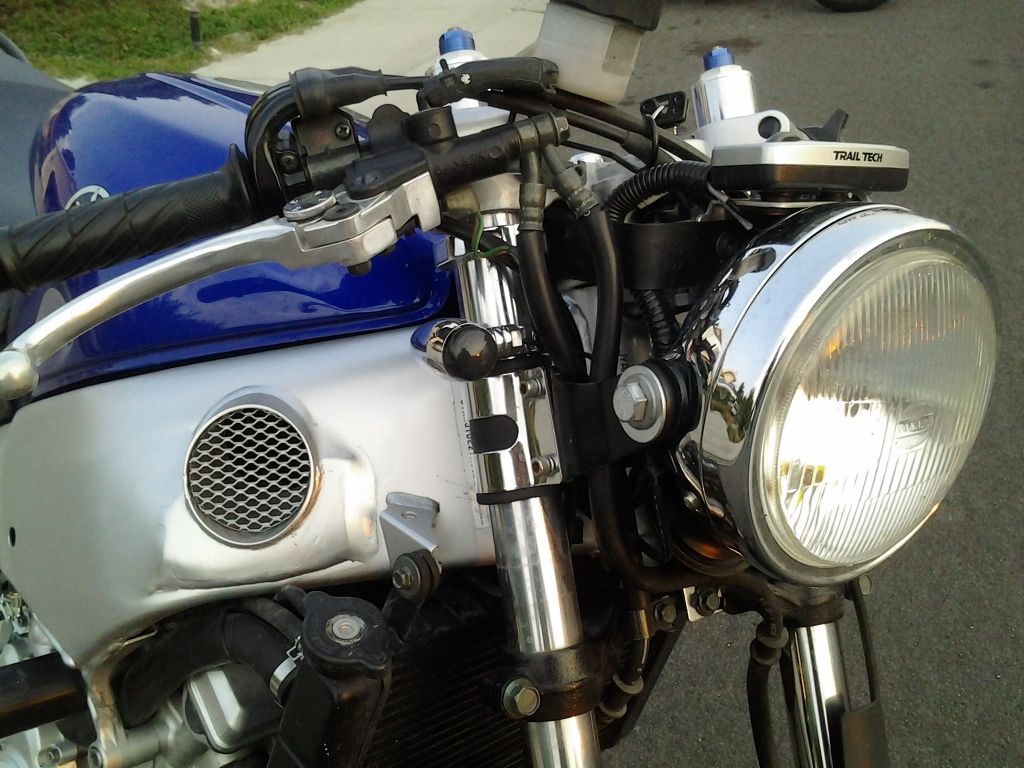
7" round head light
Smoked indicator lights, rear is intragrated with the brakes
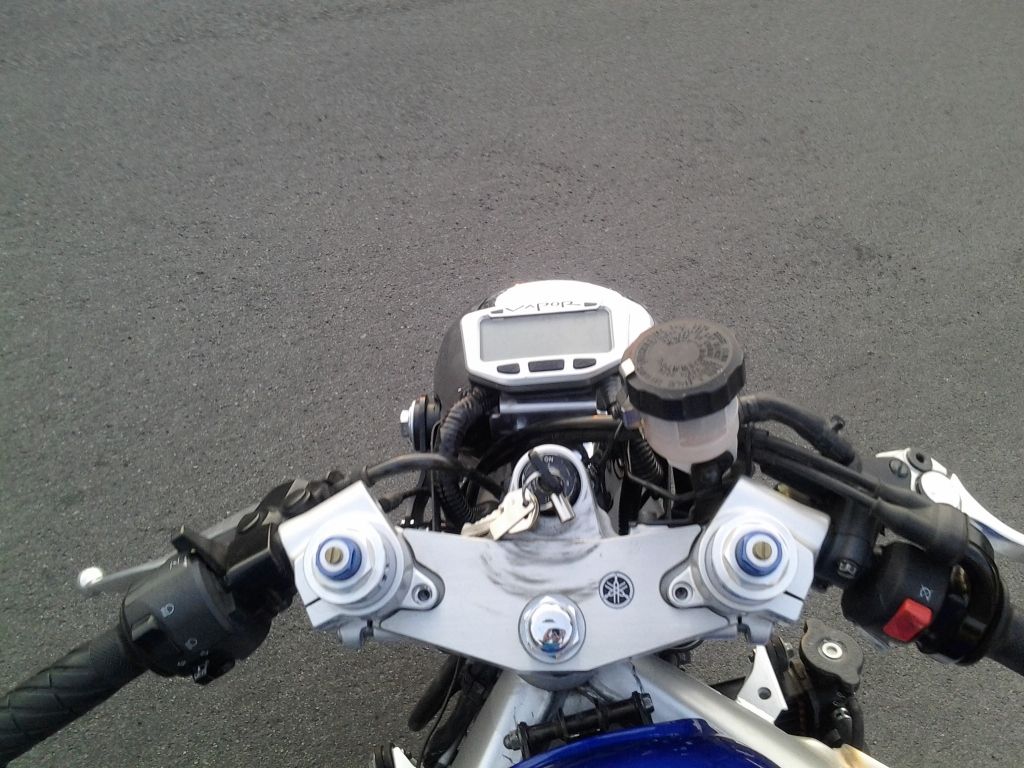
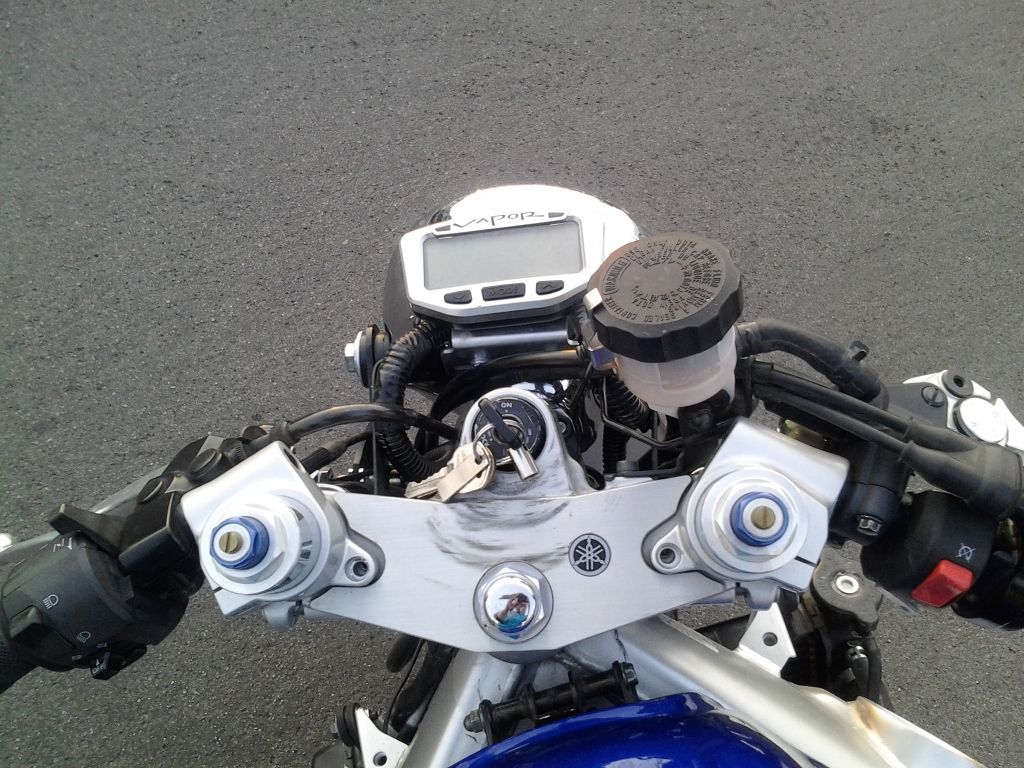
Trailtech speedo (Vapor)
Removal of the Cali Smog plumbing (they added this to the 04 and up 600R's for some dumb reason)


Here's the final product, but let me show you how I got there:


Stock bike:


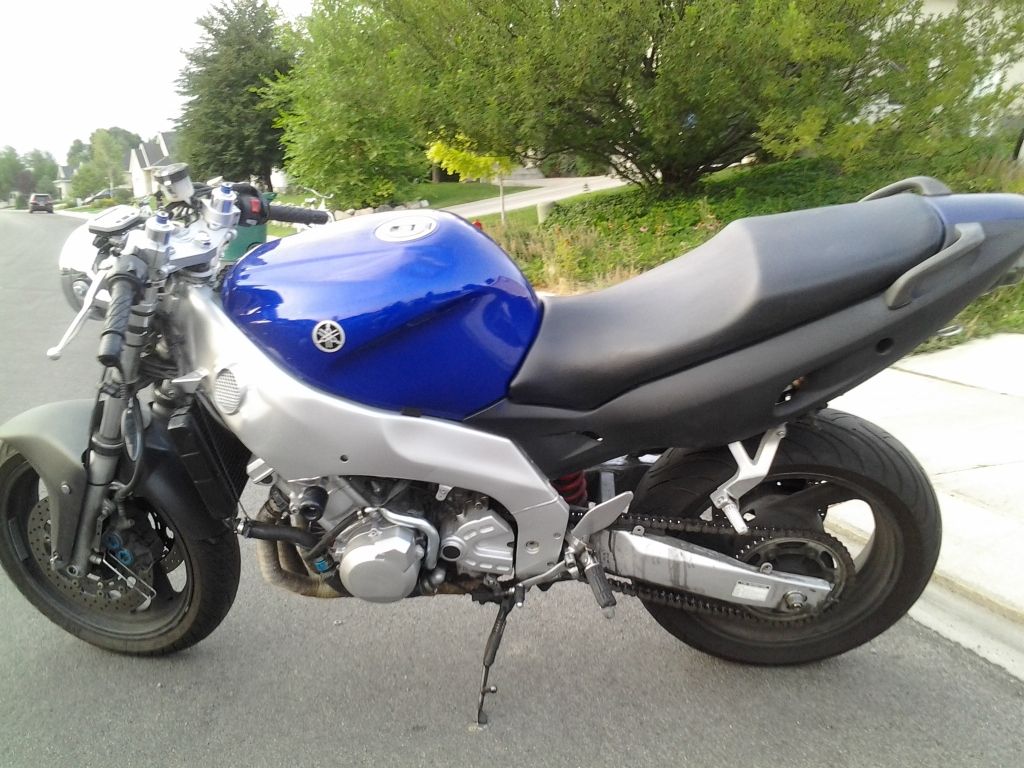
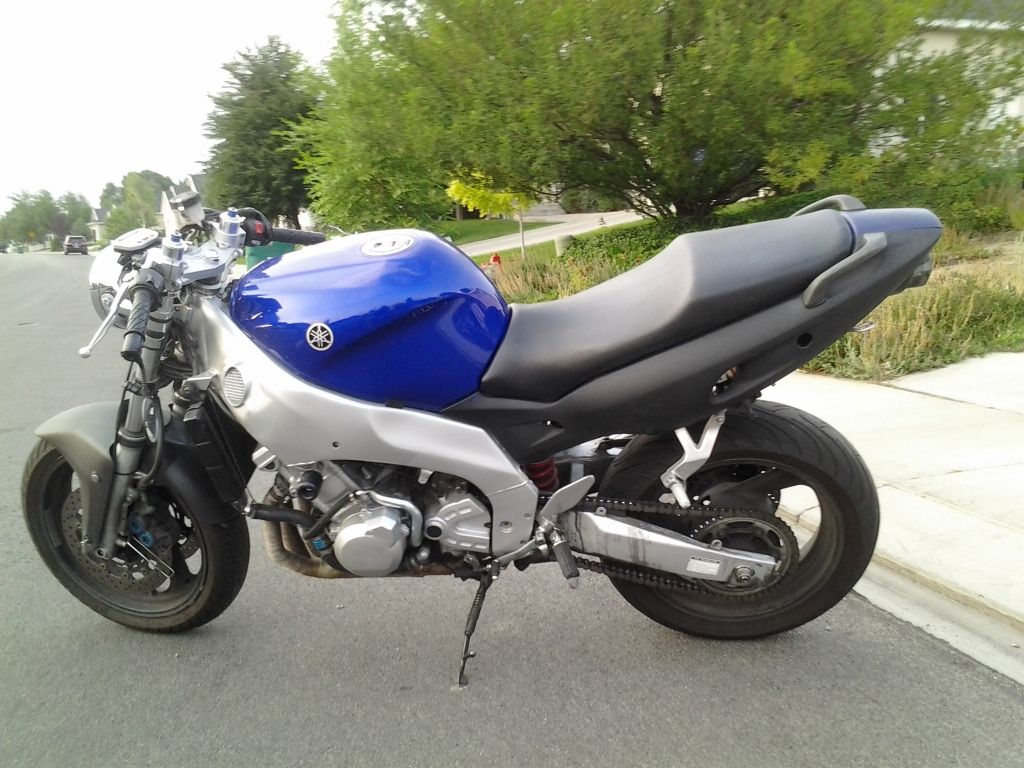
Current stage of the fighter project, I'll call it fighter phase 1.
Image


Image


Image


Image


Image


Image


Image


Image


Image


Image


Image


Image


Image


Image


Image


Image


Image


Exhaust sound check - test vid (quality, not so good. It was shot on my phone)

http://s299.photobucket.com/albums/mm318/88phill/?action=view&current=VID_20120816_195121.mp4

Hope y'all like it. I know I do :rock:

RIDE NAKED!!!
 
#4 ·
Hell yeah man chop her up!
Subscribed!

Is the new tail going to be solo or a 2up rig?
 
#7 ·
Got done doing some more work.... Time for some updates

Started with chopping the rest of the sub-frame off :CK187:
Image


Started working on my new Ducati Monster 696 seat. Fits pretty well. The trick was figuring out how to secure behind the tank.

Image


New seat on the left, old on the right

Image


Monster seat "hooks"

Image


YZF600R seat "hooks" and latch. This latch bolts the tank down.... (I'll explain with more pix, see below)


Image


They are not a perfect match. Time to figure something out...

Image

Monster rear latch

Image

YZF600R rear latch


Image

Got the idea to use some conduit straps, and mod them and the seat to make a new latch.
I had to drill out mounting bolt hole, cut our some access points, and snake a bolt threw it. Hope I don't feel em too much...

I ended flipping the tank/ front seat latch over. It end up holding the seat down pretty well. Can't stand on, it's own with any support from the sub-frame missing. but over all it's held pretty well.

Image


Image

Fit's pretty damn good! Happy with it. Now to fab up the frame and make the rear latch and secure point.

And for a teaser....
Here is how she currently sits. Still working on the sub-frame. But I got my solo seat cowl in.
Image

Looks AWESOME IMO!
 
#11 ·
Hell yes man!
Nice work on the mount. And the seat is looking freaking great, keep it up!
 
#18 ·
Been doing some more work on my tail.

Mapping our the shape and structure of my new sub-frame. Working with a good friend of mine as he possess the welding skills that I do not have.

Here are some pix of the progress that we have made. Hope to have it finished up ASAP.

Here's by buddy doing some practice welds.


He's getting use to my new welder. Purchased here http://www.harborfreight.com/welding/mig-flux-welders/90-amp-flux-wire-welder-68887-8494.html

It's a GREAT welder, especially for the price. And with his skills, it makes for awesome strength and beads too

The plan to work around the seat:


Ground down the old welds (previous sub-frames pieces will work perfectly), and now adding a support in the back, which you will see later helps the seat lock into place:


some welds done, need to put the seat lock into place:


Tried to plastic weld the seat lock and the seat together, didn't work.... So I used some JB weld (made for plastic ) and did a pass with some fiber glass. Need to sand it down and do a second coat.


More to come....

I will show the three locking points. The seat lock, the mount upfront by the tank, and the pin under the Monster 696 seat (I drilled a hole in the semi-circle plate in the back).
 
#19 ·
Looks awesome!

I'm surprised you didn't go with a Monster Seat Lock off eBay. I picked one up for $30 (shipped) and I actually was planning on utilizing the existing seat lock brace (like you), but drilling new holes to match up and weld it in place.

I was also (like you) planning on using the existing top rail as pieces for the new subframe. Looks like you've got a lot of grinding & filing to do before you paint. Those HF welders will do the job, but they leave a mess! LOL

Can't wait for more pics!
 
#20 ·
2 reasons why I didn't use the monster seat lock. 1) I wanted to use the same key and helmet lock & 2) I feel more confident in using 3 mounting/ securing points.

Keeping my ass in the seat which stays in place is very important to me LOL. I believe in repurposing and over engendering. Especially when it comes to safety and function.
 
#24 ·
Nothing yet other than another layer of fiberglass. Need to weld the sub-frame on and see where and if I need to make some tweaks. So I guess I'll know and go from there. Hope to get all the welding done this weekend.

EDIT: another layer of ugly fiber glass. Will sand and plasti-dip flat black next.


I also got my new headlamp. Need to wire it up still. Will get some pix. It has 18 LEDs (angle eye) and a projector that will work with an H4 bulb and HID.


#27 ·
Updates.....


Pic of the new sub-frame before we weld it on


welded on, now grinding the beads down to do a visual check


Welds turned out great! (will get more shots and upload later)


The seat and the mounts fit right up and square! Damn it looks good


Pic of the bottom


Seat locks - one pin, and one latching lock


Tank to seat tabs


Shot of all three locks


Next to weld the support struts onto these


from the front


A little gap between the Ducati Monster 696 seat and my YZF6006 tank. Not a bad fit IMO


A shot from the back. Very square if you ask me...


Solo seat cowl


Front shot with the cowl. Love the lines!


Shot of the tail with the cowl


The lines of the cowl and the tank go pretty well together.

Over all I am VERY happy with it.

Still need to grind and clean up some welds, but they are very strong, and they passed the stress test.

Still need to:
1. weld the support struts below
2. the seat lock/ helmet lock
3. mounts the shock cylinder expansion tank
4. passenger peg mounts
5. under tray/ battery box
6. Fab up a tail light mount
7. re-run my wiring
8. clean up the bottom of the seat and paint with plasti-dip
9. paint the frame and the cowl to match the bike

Probably more... but I can't think of anything else... for now....